
Motion tracking
that stays in your
timeline
Track a face or any object. The panel writes ordinary Motion keyframes you can still drag afterwards - nothing is imported, nothing is rendered elsewhere, and your clip is never replaced.
One-time purchase · any number of machines · works offline
Two tools, one tracking engine
Camera follows
Keyframes the clip so the tracked point stays centred.
Pin selected layer
Makes a layer above the clip move with the tracked object.
One track produces two sets of keyframes, because the two uses want opposite things. A camera wants the shake taken out; a graphic stuck to a hand wants none of it - smoothing there reads as the graphic sliding off.
What it looks like in Premiere

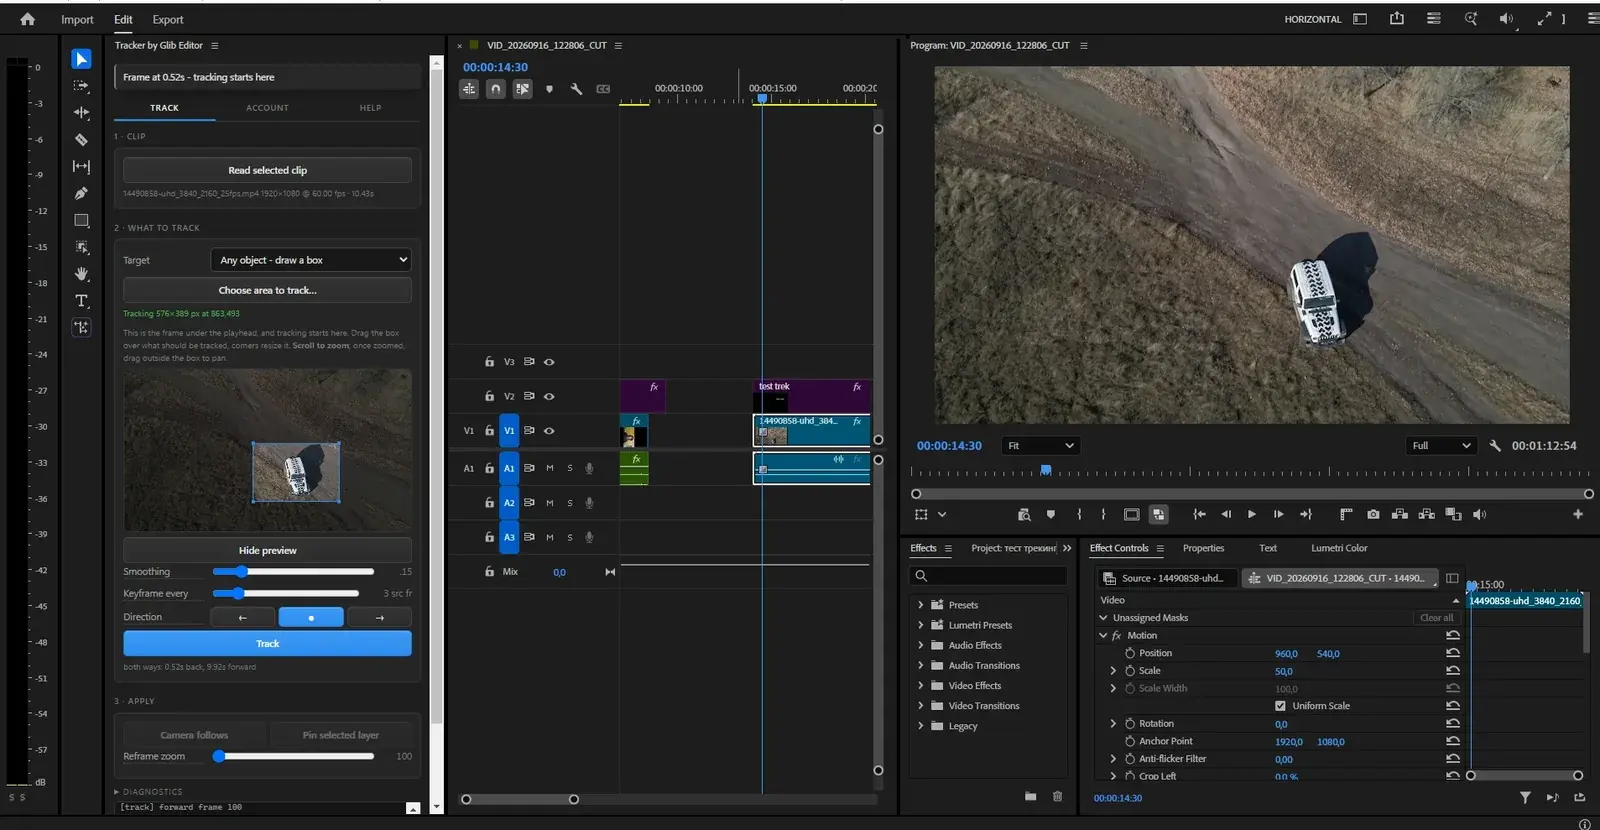
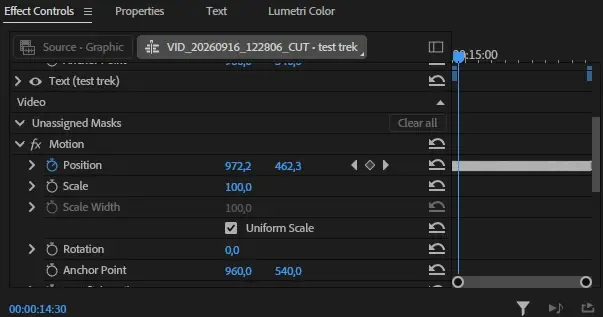
3. Ordinary keyframes come out
Position keys on the Motion effect, on the layer you already had. Nothing is imported, nothing is rendered somewhere else, and your clip is never replaced. Drag them afterwards, delete a few, or keep editing as though you had set them by hand.
Track your first clip
One-time purchase, no subscription.
See pricing